Arranger for Administrators
Tutorial
To administer Arranger, the admin must:
1. Install Arranger.
View the installation instructions.
2. Have an Elasticsearch mapping and data indexed to search.
View the Indexing Demo Data for a demo setup.
3. Admin registers the indices with arranger through the admin UI and apply configurations.
Using the Admin UI
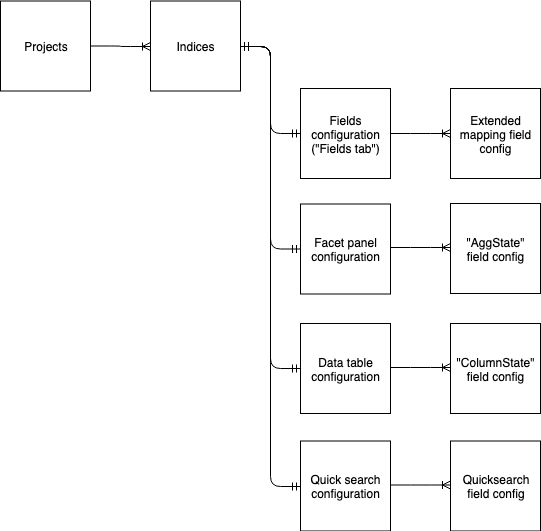
The arranger UI reflects the following pseudo entity relationship:
1) Projects:
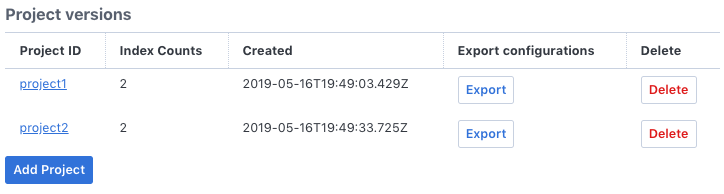
This page lists the available projects and provides an interface for registering new projects
Available functionalities:
- Adding a new project
- Removing existing project
- Export configuration data (exported data can then be imported into new projects to migrate data).
Clicking on a project id will navigate to that project’s list of indices.
2) Indices:
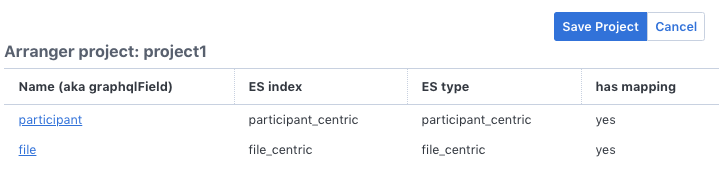
This page lists the indices registered to Arranger under the selected project.
Clicking on an index name will navigate to the configuration page for the index. The following configurations are available:
a) Fields configurations
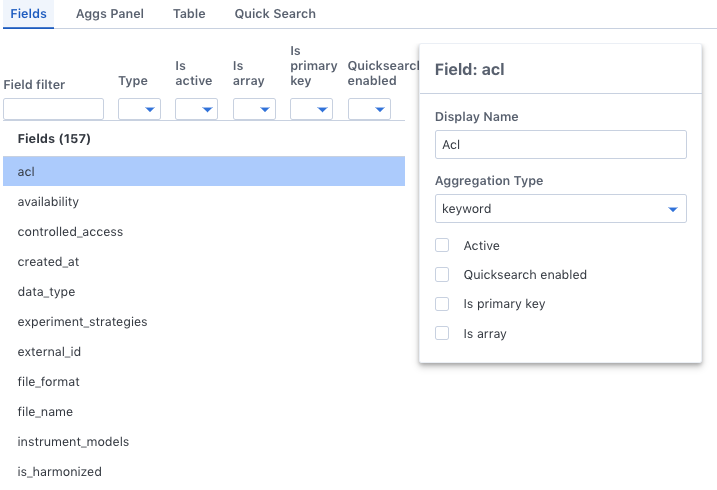
This lists all fields available in the index and allows configuration of Arranger metadata for these fields, including:
- Display Name: how the field should be displayed to user.
- Aggregation Type: lets the search portal know how to display aggregation filters for the field.
- Active: this field is DEPRECATED
- Quicksearch enabled: whether the field is enabled for quicksearch using the @arranger/components’s QuickSearch component.
- Is primary key: check if the field is the unique identifier for the index’s main entity.
- Is array: check if the field is an array. Elasticsearch’s mapping does not specify this information.
For convenience, filtering on the fields can be done through the inputs above the header.
b) Facet panel configurations
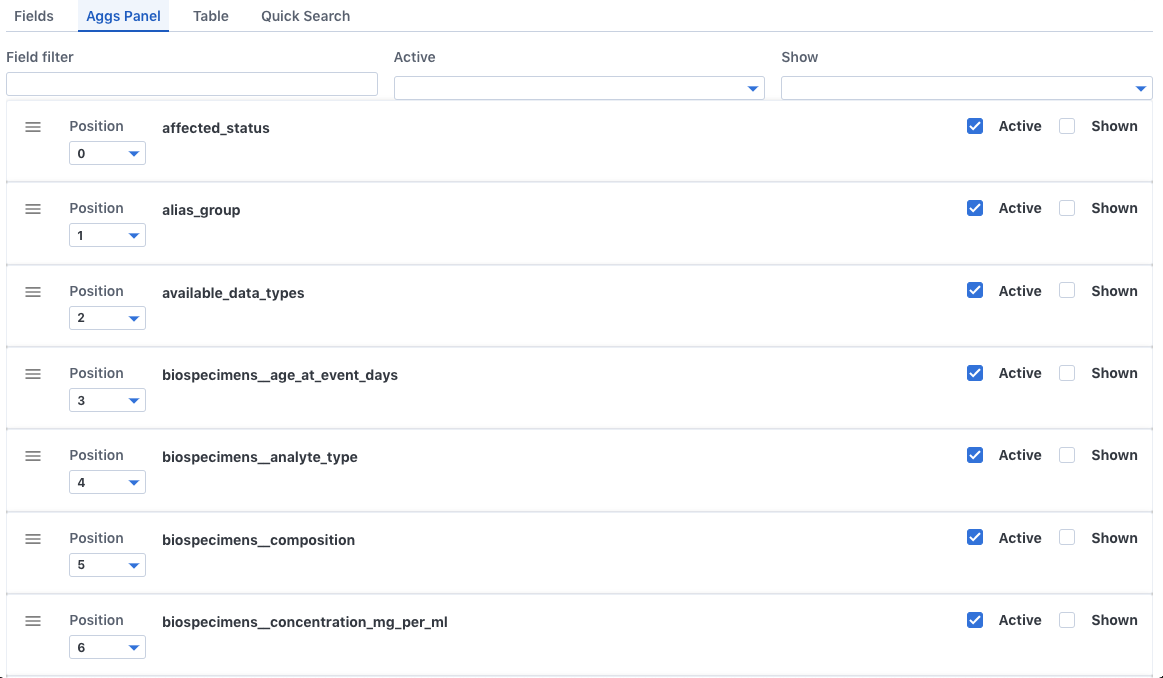
This lists all available aggregations on the fields mentioned. On Arranger’s default portal UI, this list is rendered as a facet panel. Each entry on Supported configutations:
- Ordering the facets: drag the facet on its “hamberger menu icon” to place the facet at the desired position. Alternatively, the position can also be set through the select menu beside the icon.
- Shown: displays the facet in the portal’s facet panel.
- Active: enables this facet for search. An Active facet will appear in the AdvancedFacetView component in @arranger/components. Only facets that are both Active and Shown will be shown in the portal’s facet panel.
c) Data table configurations
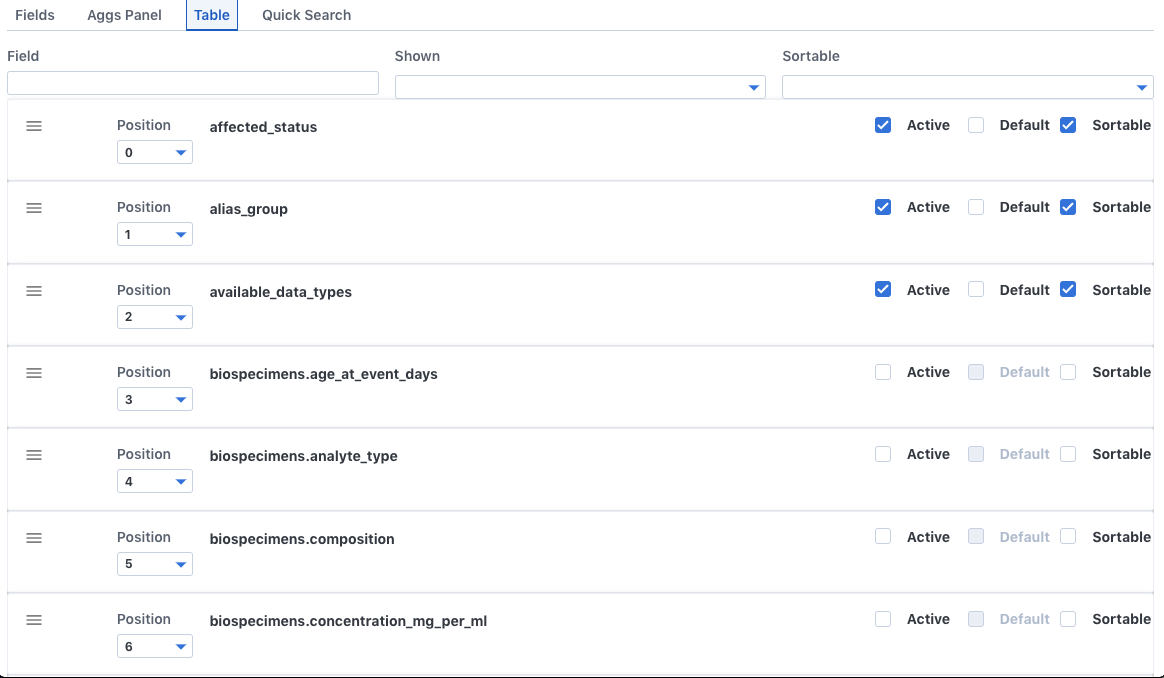
This contains configuration for the data table in the default portal. Each entry in the list represents a column in the data table. Available configurations:
- Column order: positioning can be done by dragging or using the select, similar to the facet panel.
- Active: enables this column to be viewed in the table. Does not show by default.
- Default: shows this column by default. Can only be checked if Active is checked.
- Sortable: enables sorting of the table on this field.
d) Quick search configurations
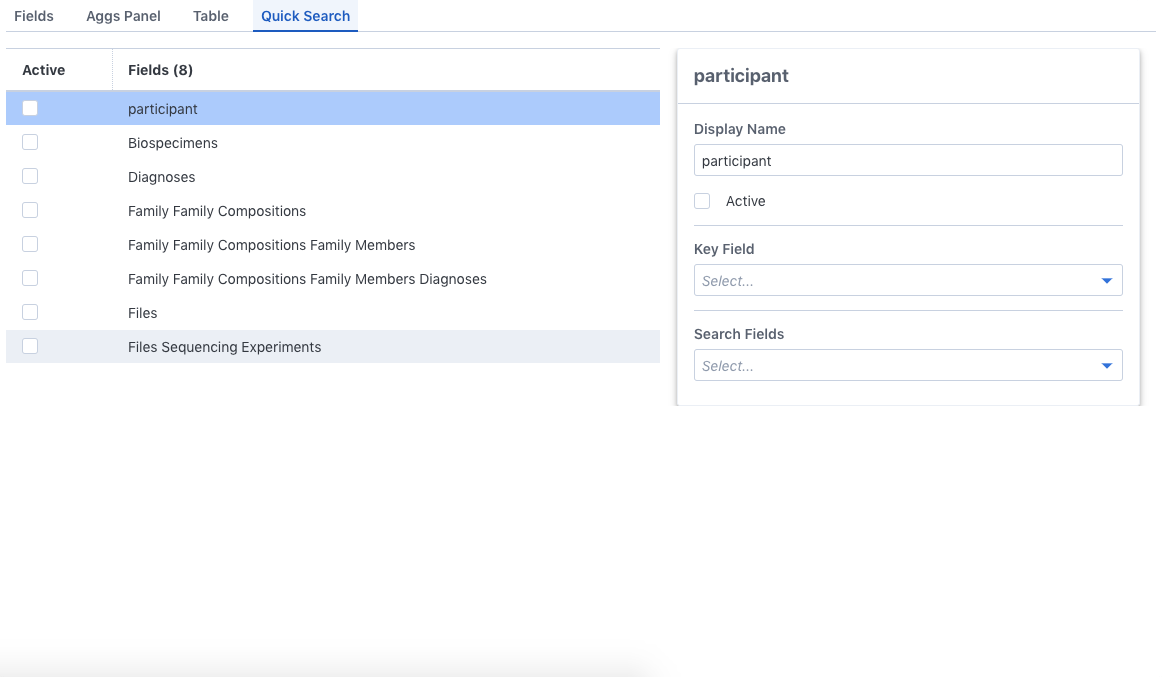
This contains configuration for the portal’s quick-search feature, which allows users to filter indexed entities by text. Currently, Arranger only supports exact match on quicksearch, but free-text search is in our roadmap to support. This feature can be exposed to end-users throught the QuickSearch UI component from @arranger/components.
Only entities (in other words, the root object and its “nested” fields in Elasticsearch) are available for quick search.
Available configurations:
- Display Name: the name to display this field as.
- Active: check to enable search for this entity.
- Key Field: the unique field that identifies each instance of this entity.
- Search Field: the properties of the entity to enable search on.