Getting Started
The easiest way to understand Arranger, is to simply use it!
Below is a description of how to get Arranger quickly up and running, as well as a description of how Arranger works and some important terms.
Quick Start
The goal of this quick start is to get a working application quickly up and running.
Using Docker:
- Download the latest version of Arranger.
- From the Arranger root directory, run docker-compose:
$ docker-compose up -d
Arranger should now be deployed locally.
Alternatively, see the Installation instructions.
How Arranger Works
- 1. Starting with some Elasticsearch (ES) indices with mappings.
- Arranger makes no assumption about your data model.
- Model your index mappings and index them.
- For demo convenience, you can follow a tutorial bellow to index some test data from our Kids First project.
- 2. Create an API version for your project from Arranger Admin.
- From your browser, navigate to http://localhost:8080
- Click “Add Project”
- Input your project id in snake_case
- Click “Add Index” for each index you want to expose from ES, with the following fields:
- “Name”: any name for your index, in camelCase
- “ES Index”: the index that you want to expose
- “ES Type”: the type that you want to expose
- Click “Add” once finalized.
- Navigate into your newly registered project’s configuration and ensure that “Has Mapping” is “yes” for all indices registered.
- Configure your project from the API and click “Save” to save as a new project.
- 3. View your data in a portal.
- From a UI:
- Go to http://localhost:8081/?selectedKind=Portal.
- Select your project and index from the dropdown.
- Note: a production-ready white-label portal using UI components provided by Arranger is in our roadmap for Arranger.
- From the GraphQL API:
- Each Arranger project created through the Admin system in step 2 creates a new Graphql endpoint.
- Start a GraphQL IDE (such as GraphiQL or GraphQL Playground
- Point your IDE to
http://localhost:5050/<project_id>/graphqlto explore the API schema (where<project_id>is the project id you have input in step 2). - For documentation regarding this API, check out the Arranger for Application Developers guide
- From a UI:
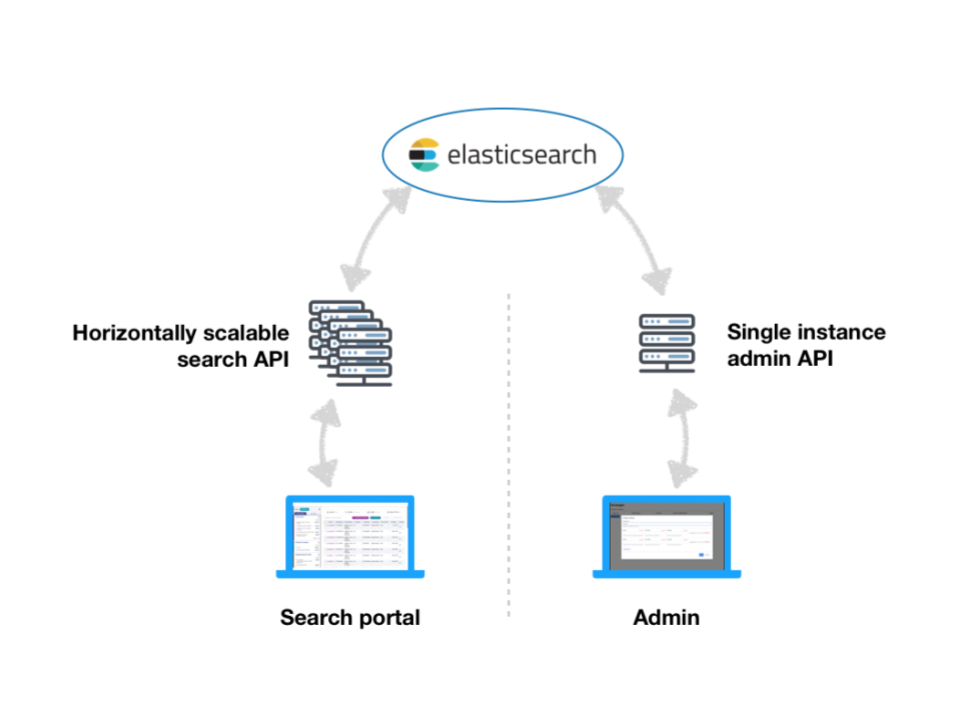
Architecture
Indexing Demo Data
- From your browser, visit the locally running Kibana at http://localhost:5601 and go to Dev Tools
- Creating a
file_centricindex:- Run these commands to create a
file_centricindex and add a mapping then these commands to index some demo documents into the index - Run these commands to create a
participant_centricindex and add a mapping then these commands to index some demo documents into the index
- Run these commands to create a
- You can run
GET file_centric/_mappingandGET participant_centric/_mappingto confirm that the mapping has been created successfully